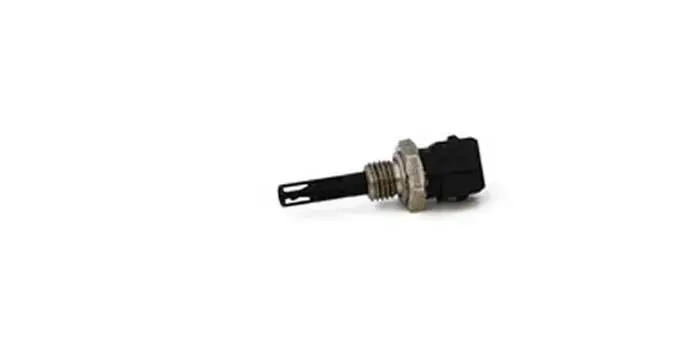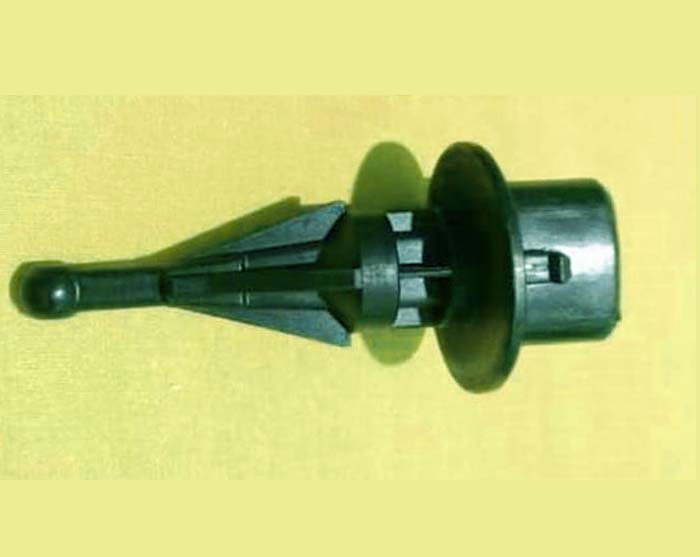
The intake manifold has sensors for the Intake Air Temperature. Before the air enters the engine, the sensor gauges its temperature. Using this data, the engine’s fuel consumption needs to be calculated in order to maintain an ideal combustion ratio. By estimating the outside air temperature and transmitting this information to the car’s computer, the Intake Air Temperature sensor’s key role is to control the fuel mixture.
The sensor is situated close to where it enters the intake manifold and is typically protected from contamination and debris by a plastic cover. Intake Air Temperature sensors that are unclean may give false readings, which would result in poor fuel economy and more emissions. Intake Air Temperature sensors that are dirty can also cause stalling while accelerating or a rough idle while idling at stoplights.
Do you ever feel like your car is running hotter than usual? If so, it could be due to a dirty intake air temperature (IAT) sensor. In this blog post, we’ll explain how to clean an IAT sensor and why it’s important for the health of your car.
Related Post: What Is Intake Air Temperature (IAT) Sensor
How To Clean Intake Air Temperature (IAT) Sensor
Cleaning your Intake Air Temperature (IAT) Sensor is an important part of keeping your car in top shape. It should be done every 15,000 – 20,000 miles and is relatively simple to do. All you need is a can of compressed air, like the kind used to clean the MAF sensors and other electronics.
Cleaning the sensor will restore functionality if it is dirty. To make your Intake Air Temperature sensor last longer, it’s crucial to clean it sometimes. You may quickly and easily clean your Intake Air Temperature sensor by following the below three simple steps.
- Remove Intake Air Temperature Sensor
- Spray Intake Air Temperature Sensor
- Clean The Intake Air Temperature Sensor
1. Remove Intake Air Temperature Sensor
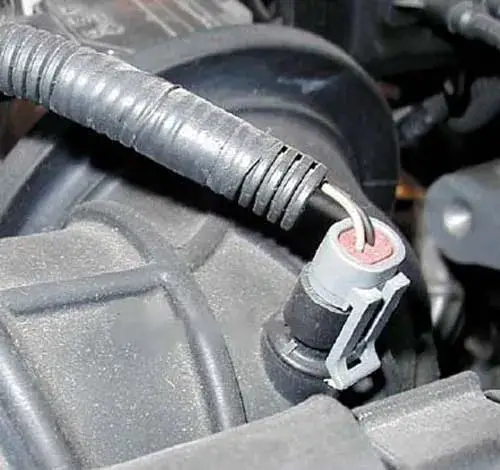
Begin by removing the battery cable and then detach the IAT sensor wiring harness and cautiously extract it from the manifold with a small flathead screwdriver. Be careful not to use anything that could damage the silicon membrane inside.
2. Spray Intake Air Temperature Sensor
Then spray the inside lightly with a cleaning agent. Use 10-15 blasts of MAF sensor cleaner around the inside of the sensor and on the sides of it.
3. Clean The Intake Air Temperature Sensor
After this is complete, wait a short while, and then wipe off any dirt or dust with a dry cloth. You can reattach your IAT sensor and enjoy a smoother ride.
By following these steps, you can be confident that your IAT will remain in proper working condition for many miles to come.
In conclusion, if the Check Engine Light is on and you have determined that the Intake Air Temperature Sensor needs to be cleaned, then it is a relatively easy and inexpensive job to undertake. First, take off the negative battery cable as a safety precaution and remove the sensor from the air intake tube. Second, clean the sensor with a brush or spray cleaner. Third, reinstall the sensor in its original location and reconnect it.
Related Post: 7 Symptoms Of Bad Intake Air Temperature (IAT) Sensor
Sign Up