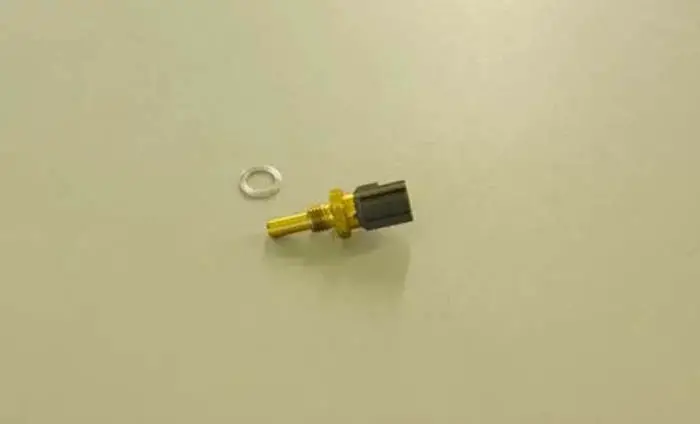
The coolant temperature sensor also called an ECT sensor is a thermal resistor, which measures the engine’s coolant temperature to protect the engine from overheating.
Coolant temperature sensors are used to ensure the efficient working of the operating system of the engine. It senses the temperature of the system. Using its negative temperature coefficient, it optimizes the temperature to the degree to which the engine works most effectively.
Due to constant functioning, the coolant temperature sensor starts wearing out. The sensors do not stop working immediately, they deteriorate gradually. This calls for a Coolant temperature sensor replacement.
In this powerful guide, you will learn how to replace the coolant temperature sensor with seven quick steps.
Related Post: Engine Coolant Temperature Sensor
Engine Coolant Temperature Sensor Replacement
Before reaching the stage where the Engine Coolant Temperature sensor can no longer be used, many intermediate stages indicate that they start malfunctioning. The symptoms include poor fuel efficiency, engine overheating, engine releasing black smoke, and engine light indication.
If you keep on driving with any of these symptoms, it can be harmful to you and your car. The engine keeps on heating and you will end up with a destroyed engine.
Replacing the coolant temperature sensor on time will not only save you money but also increase the life of your car’s engine drastically. Hence, the replacement of the coolant temperature sensor is worth it.
The coolant temperature sensor lasts for around 100,000 miles. Therefore, its replacement should be ensured occasionally.
Related Post: Where Is The Engine Coolant Temperature (ECT) Sensor Located
7 Quick Steps For Coolant Temperature Sensor Replacement
Step 1: Diagnose The Problem

The first step is to locate the issue in the coolant temperature sensor. There could be more than one reason why your coolant temperature sensor starts working improperly. As the coolant temperature sensor consists of many parts such as wiring, connector, etc, it might be possible that one of them got broken.
It is necessary in this case to point out that part in order to get the system fixed. Make sure that you are diagnosing the engine when it is cold and that you have your gloves and safety glass on.
Related Post: How To Test Coolant Temp Sensor Wiring With Multimeter
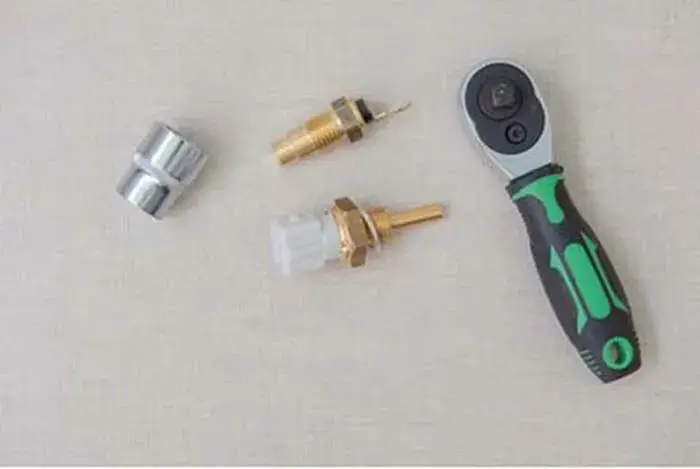
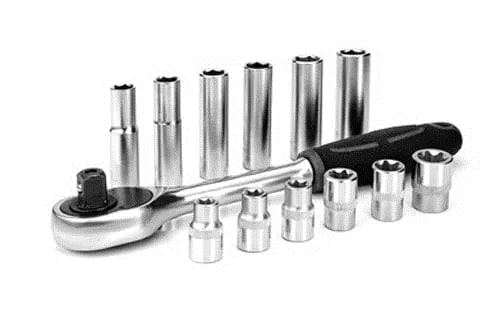
Step 2: Collect All The Required Materials
Now, you have come to know that problem is in the sensor, it is quite simple to replace a coolant temperature sensor. However, you need to make proper arrangements before replacing it.
You require some materials to replace a coolant temperature sensor. It includes a coolant collection pan, funnel, flat head screwdriver, jack, new coolant, jack stands, pliers, safety glass and gloves, work light, socket wrench set, and new coolant temperature sensor.
Related Post: Wire Coolant Temperature Sensor Wiring Diagram
Step 3: Jack The Front Side Of Your Car
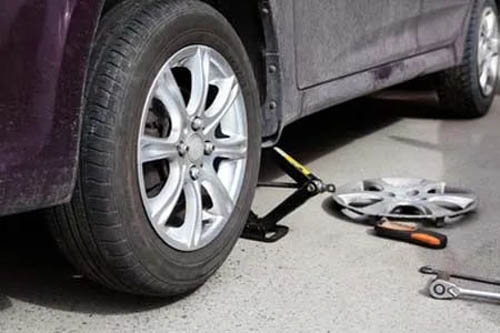
After you gather all the tools to replace the sensor, the next step is to raise the level of the car with the help of the jack and jack stands. Sometimes, the coolant temperature sensor is at the front of the car, hence you need to raise the front side.
Before applying a jack, it should be ensured that the car is parked on a flat surface. Avoid applying the jack when the car is on an inclined surface or a driveway.
This is an Info
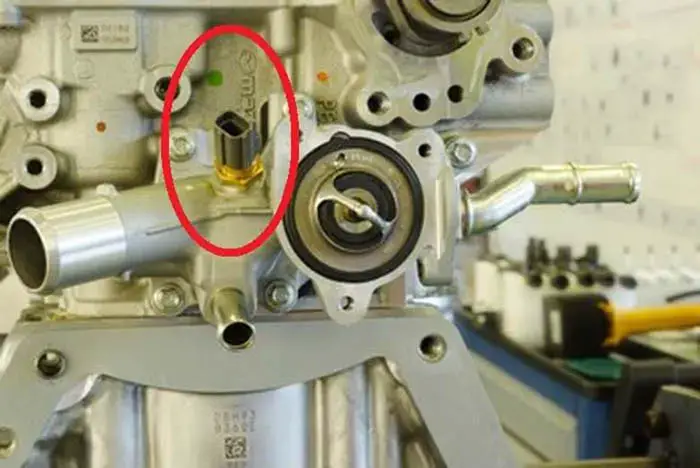
Every car has a coolant temperature sensor installed at the front, but the location can be different. Make sure to locate the exact position in your car.
Step 4: Drain And Replace The Fluid In The Radiator

Open the hood and the cap of the radiator and then that of the coolant reservoir. Once you open the cap, the pressure in the coolant system reduces, which allows you to replace the coolant easily.
You can drain the radiator either by removing the petcock or by removing the drain plug of the radiator. Now, replace the drain plug if you removed the drain plug or reinsert the petcock if you removed that
Related Post: Can A Bad Coolant Temp Sensor Cause Rough Idle
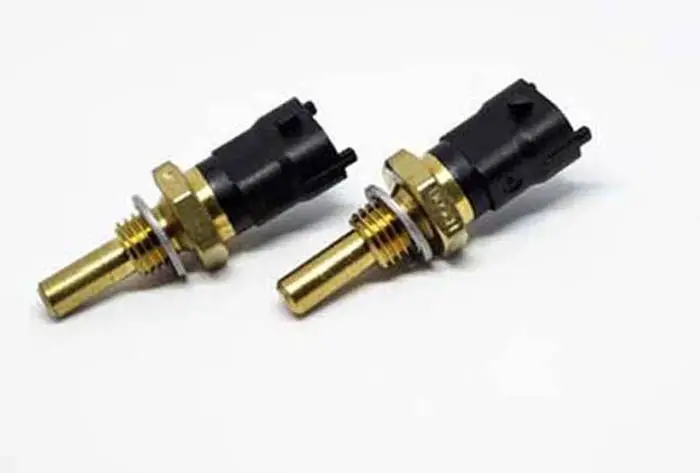
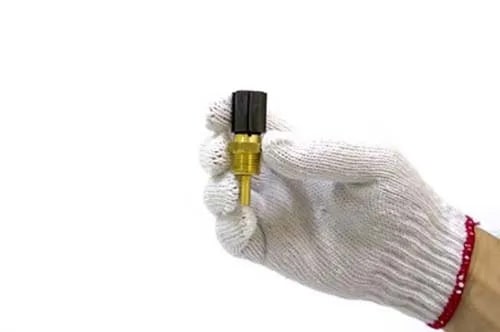
Step 5: Replace The Sensor
To replace the sensor, first, you need to remove the electronic harness with the help of a flat-head screwdriver. Then lose the sensor by turning the socket anti-clockwise, and taking it out from the engine block.
Clean the socket and install the new temperature sensor by turning the socket clockwise. Ensure that the sensor is properly fixed by tightening it manually with the extension and socket. After replacing the sensor, reattach the harness and tighten the plug of the radiator.
This is an Info
Handle the sensor carefully and don’t fix it too tightly.
Step 6: Add The Coolant

Add the fresh coolant to the radiator. Check the manual of your car and if recommended, mix the coolant with distilled water. Once the radiator is full, add the remaining coolant into the reservoir. Now dispose of the coolant buckets and lower the car to the ground level.
Related Post: 9 Symptoms Of A Bad Engine Coolant Temp (ECT) Sensor
Step 7: Test The Car

When you are done with the replacement of the coolant and the sensor, start the car to see if everything is working smoothly. Take a test drive and check for the leaks in the system, if there are any. If you find the leaks, fix them.
Related Post: How To Test A Knock Sensor With & Without Multimeter
Common Mistakes in Installing a Coolant Temperature Sensor
- Not reading the instructions before beginning installation: Before you begin the installation process, be sure to read all instructions thoroughly so that you can avoid any rookie mistakes.
- Not checking the wiring: Before installing your new coolant temperature sensor, make sure to check the wiring to ensure that it is functioning properly. This will help you avoid any potential issues while installing the sensor.
- Installing the wrong type of sensor: Make sure to check the specifications of your vehicle to ensure that you are purchasing and installing the correct type of coolant temperature sensor.
- Not testing the sensor after installation: After the coolant temperature sensor has been installed, it is important to test it to ensure that it is functioning properly.
- Not replacing the coolant (liquid) after installation: After installing the coolant temperature sensor, it is preferred to replace the coolant as this will help to ensure that the sensor is working correctly.
- Not checking the voltage output: After installation, it is important to check the voltage output of the coolant temperature sensor. If the output resistance (and voltage) changes incorrectly beyond its normal range, it could cause issues with your vehicle.
Frequently Asked Questions (FAQs)
The average time it takes to replace a coolant temperature sensor is between 2-3 hours. However, the time can vary depending on the make and model of the vehicle. The sensor is usually located near the thermostat housing or near the engine block. If the engine is running, wait for 1 hour after turning it off to allow the coolant to cool before removing the sensor.
The coolant temperature sensor is usually easy to replace, but it is important to consult your vehicle’s service manual for specific instructions. In some vehicles, the coolant temperature sensor may be located in the radiator and may require the radiator to be removed in order to access the sensor. In either case, the coolant temperature sensor is a relatively easy repair that can be completed with a few tools.
Sign Up