Fuses are the gatekeeper and sacrificial devices of electrical circuits in case of power surges. It protects the electrical circuits from overload and other electrical problems. It is a crucial and common element in an electrical circuit. Ideally, every electrical circuit should have a fuse.
Sometimes these fuses require testing to check whether they need replacement or are still working. These fuses can be tested in many different ways including with and without a multimeter, even without removing them from the fuse box. In this powerful step-by-step guide, you will learn how to check a fuse with a multimeter.
Related Post: Ultimate Guide To Car Fuse
How To Test A Fuses With A Multimeter

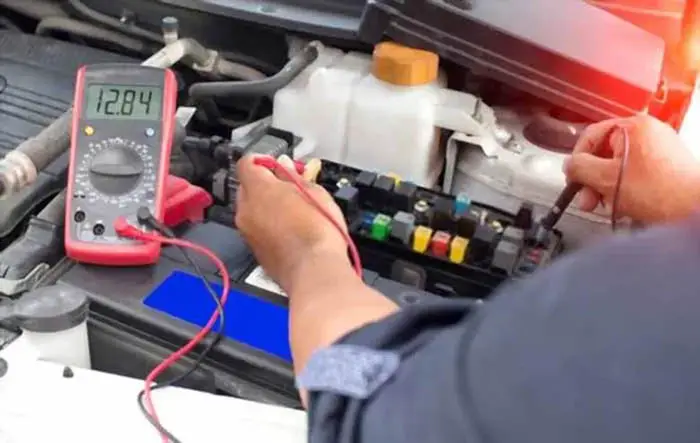
Testing a fuse using a multimeter can be the safest way to identify a blown fuse. Some fuses have transparent casings (like blade fuse, glass fuse, cartridge fuse, etc). Such type of fuse in your car can be easily diagnosed by visual inspection to confirm if the metal wire inside the fuse has blown and should be replaced if it is found to be blown.
However, some fuses do not have a transparent casing, and the broken metal element of a fuse cannot be detected through visual inspection. In such cases, a multimeter is used to determine if a fuse is bad and needs to be replaced. Now In this step-by-step tutorial, I am showing you two methods on how to test a blown fuse by using a digital multimeter.
Method 1. How To Test A fuse Using An Ohmmeter
Method 2. How To Test A Fuse Using Multimeter Continuity Mode
Method 1. How To Check Fuses Using An Ohmmeter
In this method, we will learn how to test a car fuse without removing it using an ohmmeter. But, before we further go, I want to help you understand how an ohmmeter works so that when you test a fuse, you will have no problem diagnosing a bad fuse.
Step 1. Know The Ohmmeter
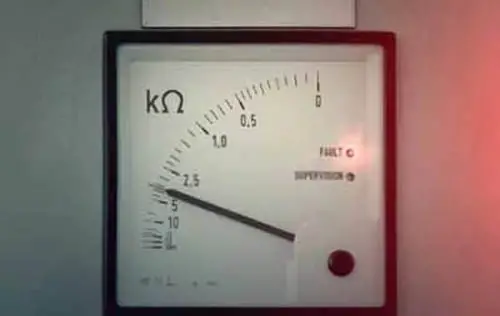
Resistance is the electrical friction to the flow of current in a conductor. It is measured in ohms. The device, which is used to measure resistance is called an Ohmmeter. The Ohmmeter reads the open and closed circuits in two different resistive ways.
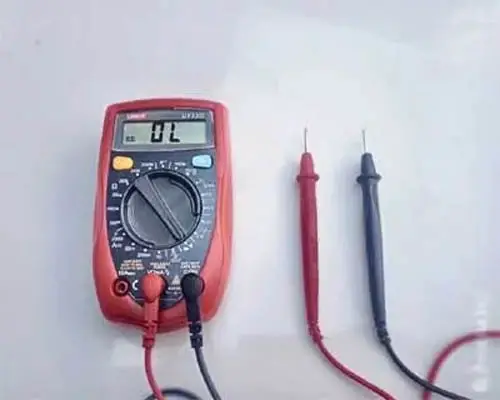
The Ohmmeter reads the resistance of the open circuit by either 1 Ω or by a non-numerical “OL” value ( Which is pre-programmed in an Ohmmeter).
Where 1 Ω indicates a 100% resistance means full resistance (No-Connectivity or Open Circuit) and “OL” indicates, some call it “Open-Load”, “Open-Loop”, Other calls it “Over-Limit”, or “Open-Line”.
But whatever it denotes, one thing is clear whatever is being measured is not making a path for electric current to flow from the red lead to the black lead of the multimeter (No Connectivity), which means the circuit is open.
On the other hand, the ohmmeter reads “Closed Circuit” in numerical values of zero or near-zero, and in some ohmmeters, the numerical value of “Closed Circuit” is less than 1 Ω (If the highest resistance is programmed “1 Ω” in digital ohmmeter).
Now come to the test procedure.
Related Post: How To Test MAP Sensor With And Without Multimeter
Step 2. Connect The Leads In Multimeter
Connect the black probe to the common socket and the red probe should go to the (Ω) omega socket.
Step 3. Set The Scale On Ohmmeter
Turn it ON and move the dial of the ohmmeter to the lowest resistance range on ohm mode. The multimeter should read 200 ohms as the lowest ohm range here.
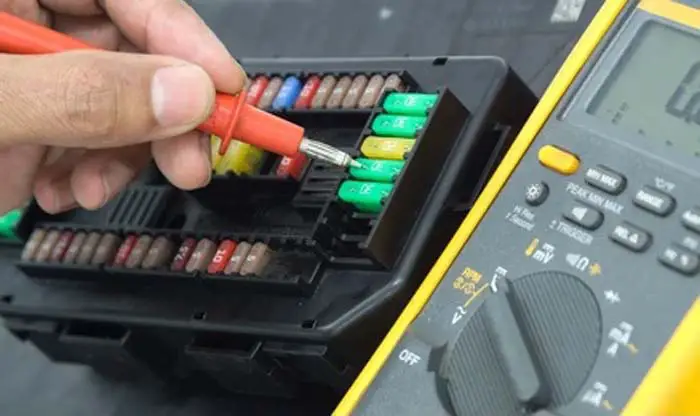
Step 4. Place The Tip Of The Lead On The Fuse
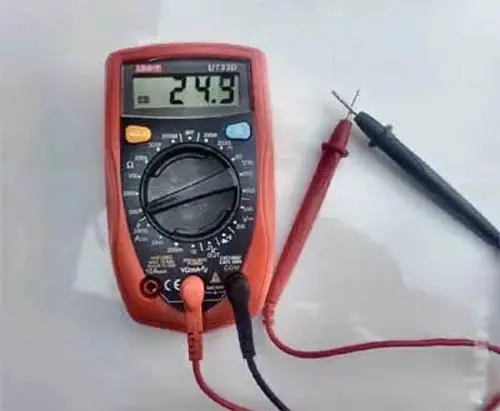
First, place the fuse on a non-conducting material like plastic or wood and touch the tips of the testing leads together to get an initial reading as a standard we will compare it with the fuse test. After that, place both tips of the black and red leads on the terminals of the fuse, which comes with two metal tabs at both ends.
This is an Info
Fuses are polarity-free safety devices. No matter, whatever tip of the lead can be touched with any terminal of the fuse. You can confidently touch any tip of the probe to any terminal of the fuse.
Related Post: How To Test Intake Air Temp (IAT) Sensor With Multimeter
Step 5. Measure The Ohmmeter Reading

After touching the tips of both leads to fuse terminals, now look for the ohmmeter readings. If the ohmmeter resistance reading is similar to the reading you touched together the leads, before testing the fuse or if the reading changes to a little low or high resistance value, it means the fuse is still good and has connectivity between two terminals.
On the other hand, if the ohmmeter resistance reading does not change and still shows the 1 Ω (100% resistance) or “OL” it means the fuse has blown and has no connectivity between the two terminals.
Step 6. Turn OFF The Multimeter
In the end, turn off the multimeter after testing.
Step 7. Never Use Ohmmeter On A Live Circuit
One important thing you need to know beyond testing the fuse. Never use an ohmmeter on an electrically live circuit. It can kill your ohmmeter.
This is an Alert
Always use an ohmmeter on a dead circuit. A live circuit can kill the Ohmmeter. It is because the ohmmeter itself supplies voltage to the circuit, no other voltage is needed.
Method 2. How To Test A Car Fuse Using Multimeter Continuity Mode
In this method, you are going to learn how to test a car fuse using multimeter continuity mode. Below is the step-by-step procedure for testing the car fuse with a multimeter.
Step 1. Remove The Fuse From The Circuit
First, remove the fuse from the suspected circuit.
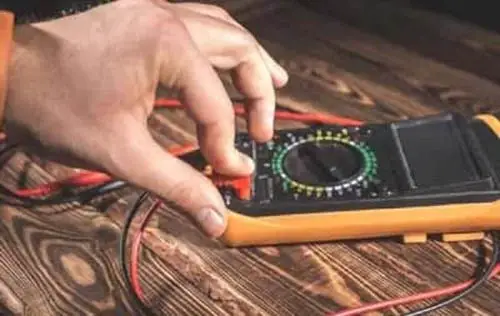
Step 2. Select The Continuity Scale On the Multimeter
Turn the selector to continuity scale or radio wave symbol on the multimeter and have a quick test to prove the multimeter is good by touching both leads together to hear a beep sound.
Step 3. Connect The Leads To Fuse
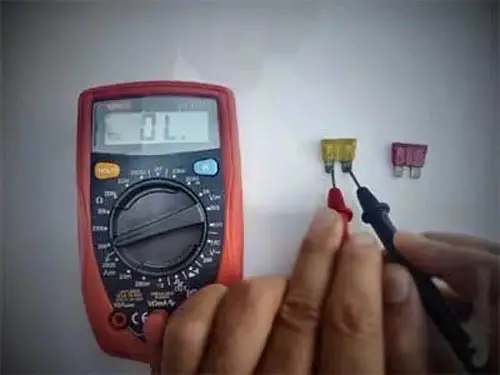
Place the fuse on a non-conducting material and connect the tips of the black and red leads with both terminals of the fuse.
This is an Info
While testing a car fuse, you can connect both the positive or negative lead with any terminal of the fuse. They are polarity-free (No Restriction).
Step 4. Read The Multimeter Display
When both multimeter leads are touched to the terminals of the fuse, it will make a beep sound if the fuse is good. If no beep sound is heard, it means you need to replace a fuse.
Tips And Tricks About Testing Car Fuses With A Multimeter
Here are some tips and tricks for testing a fuse:
- Make sure the circuit that the fuse is protecting is turned off before testing.
- A multimeter with continuity testing capability is a useful tool for testing a fuse. Continuity mode allows you to check if the fuse is blown or not.
- Remove the fuse from its holder in the circuit before testing it.
- Visually inspect whether the fuse is broken, this can give you an idea if the fuse is blown or not.
- Use a fuse tester or continuity tester, these are devices specifically designed for testing fuses and can quickly know if a fuse is good or bad.
- If you suspect the fuse is blown but you’re not sure, it’s best to replace it with a new one.
- Always be cautious when working with electricity and if you are unsure about the process, consult a professional electrician.
- Always keep spare fuses with you, that way you’ll be prepared when a fuse blows.
- Keep in mind that fuses have a lifespan, and it’s a good idea to regularly check and replace old fuses to ensure the safety of your electrical system.
Final Thought on Testing An Automotive Fuse With Multimeters
In conclusion, testing a car fuse with a multimeter is an easy, effective way to identify problems in the vehicle’s electrical system. By following the simple steps outlined above, you can easily determine if your car fuse is still working well or if you need to replace a bad fuse with a new fuse.
It’s important to remember that if you are not comfortable handling automotive repair and maintenance yourself, it is best to check the owner’s manual or take your vehicle to a professional mechanic.
FAQs
To determine if a fuse is blown and will need replacement using a multimeter, first turn the meter on and set it to the continuity setting. Then, touch one lead of the multimeter to one end of the fuse and the other lead to the other end of the fuse. If the meter beeps or displays a low resistance reading, the fuse is still good. If there is no indication on the meter, the fuse should be replaced.
Yes, a multimeter can measure the continuity of two metal parts. To measure its continuity, first, turn the meter on and set it to the continuity setting. Then, touch the probes to the two metal parts you want to test. The multimeter will indicate whether there is continuity (a low resistance reading or a beep) or not.
To properly use a multimeter to test the positive and negative leads of a DC voltage, first, turn the meter on and set it to the DC voltage setting. Then, touch the red probe to the positive lead and the black probe to the negative lead. The multimeter will display the voltage reading.
One common type of corrosion that can occur on metal parts is rust. Rust is caused by the reaction of metal with water and oxygen. To prevent rust, metal parts should be kept clean and dry, and should be coated with a rust inhibitor.
Sign Up