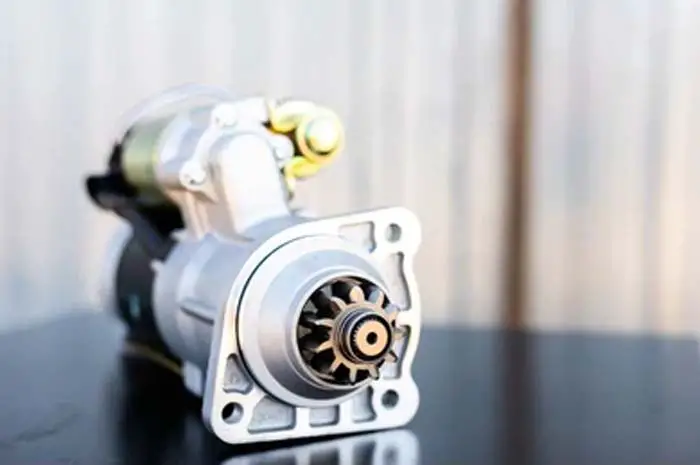
A starter motor is an electric motor that turns over the engine to start it. It is usually powered by a lead-acid battery. The starter motor has a small gear that meshes with a large gear on the flywheel. When the starter motor is turned on, the small gear turns the flywheel, and the engine starts.
If your car starter fails to engage the engine, it may be time for a bench test. This type of test is conducted by removing the starter from the car and testing it on a workbench. Bench testing a starter is not difficult, but it does require a few tools and some patience. With the right tools and a little know-how, you can troubleshoot and repair your starter at home. Read more to know how to bench test a starter in five different ways.
Bench Testing A Starter
In this section, you are going to learn starter motor bench tests with a multimeter with no load free-running, where the starter motor is fully removed from the car.
A starter motor has a huge role in starting a car. Like other car parts, it can also wear out and lose its job. If a car does not start and you hear nothing while trying to start the engine, and also the starter circuit seems to be ok then, it might be the problem with the starter motor.
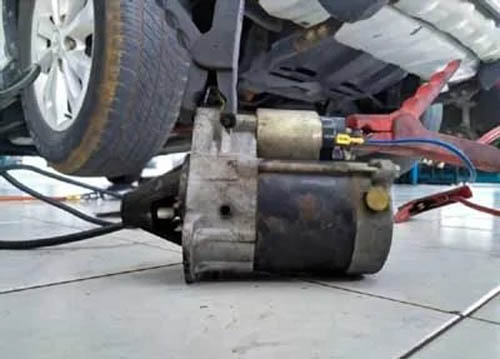
Testing a starter motor is necessary for cranking the engine. The first thing you need to do is to completely remove the starter motor from the vehicle, disconnect the starter circuit’s wiring, unbolt it and place it on a non-conducting material like a wood bench.
Make sure to remove the jewelry from the hand or any other conducting material not to cause a short circuit. Hold the starter motor firmly in a vice or have a helper place the foot on the starter motor while testing, it can jump around crazily if not held firmly.
Tools You Need
Two jumper cables, Digital multimeter, Alligator clip, Full charged battery, and a vice (Optional).
This page includes the following tests.
Test No 1: Testing Starter Motor And Solenoid
Test No 2: Starter Motor Test
Test No 3: Solenoid Test
Test No 4: Starter Motor Resistance Test
Test No 5: Solenoid Continuity Test
Related Post: How A Starter Motor Works: A Detailed Insight
Test No 1: Bench Test Starter Motor And Solenoid
Below is the step-by-step procedure of the starter motor and solenoid bench test.
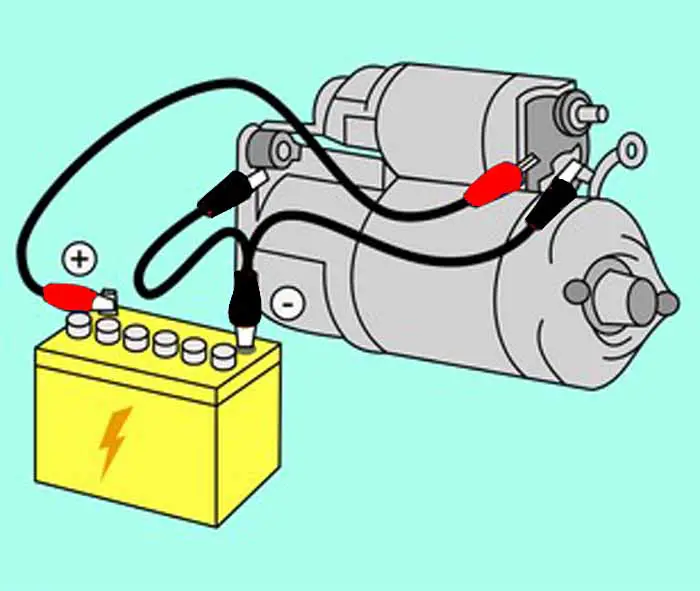
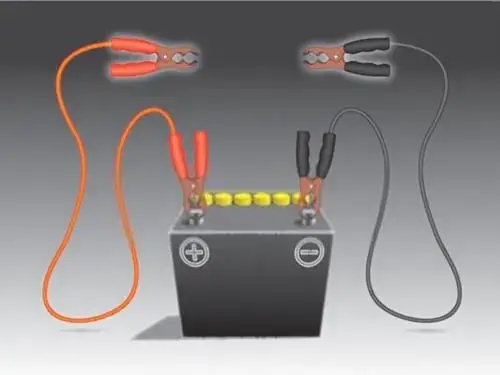
Step 1: Connect The Red Jumper Cable
Take two heavy jumper cables, red and black, and put one end of the red heavy jumper cable to the battery positive terminal and the other end to the starter motor heavy feeding terminal stud.
Step 2: Connect The Black Jumper Cable
Similarly, put one end of the second black heavy jumper cable to the battery negative terminal and the other end to the starter motor case.
Step 3: Connect The Alligator Clip
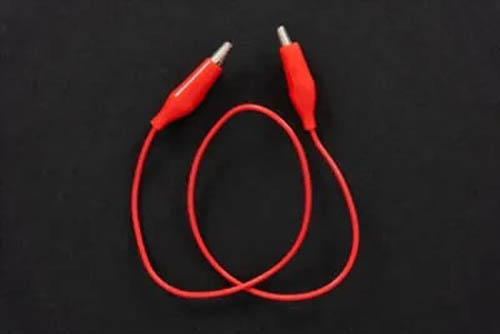
Now put one end of the smaller gauge alligator clip to the battery positive terminal and the other end to the starter motor solenoid control terminal. Here now, you will observe two possible outcome interpretations.
Outcome Interpretation 1
If, the pinion gear spins but does not move forward. It means the starter solenoid is bad. Because the motor is doing its job, which spins the pinion gear, but the solenoid doesn’t work properly, which finally does not move forward the pinion gear.
Outcome Interpretation 2
If the pinion gear moves forward but does not spin. It means the starter motor is bad. Because the solenoid is in good condition, which moves forward the pinion gear but, the starter motor is dead, it does not rotate the pinion gear.
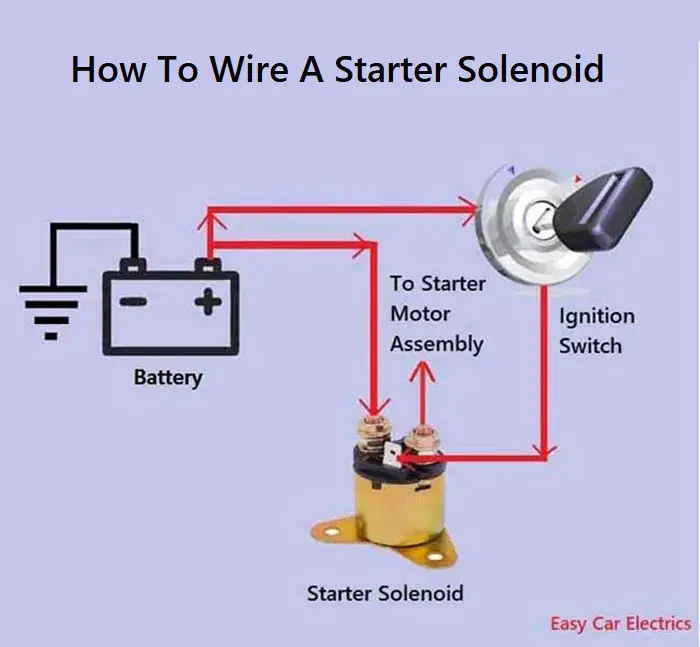
Related Post: Starter Solenoid Wiring Diagram: 3 Pole Starter Diagram
Test No 2: Bench Test A Starter Without Solenoid
In this starter motor bench test, we will discuss the procedure of testing the starter motor on the bench. We need the following tools to perform the test.
Two heavy jumper cables and a Strong battery.
Step 1: Attach The Black Jumper Cable
Attach one end of the black jumper cable to the battery negative terminal and the other end to the starter motor case.
Step 2: Attach The Red Jumper Cable
Correspondingly, attach one end of the second red jumper cable to the battery positive terminal. And the other end to the starter motor output terminal stud (the terminal which goes to the starter motor assembly from the solenoid).
Possible Outcome
Now here are the Possible Outcomes. The pinion gear should spin (without moving forward). If it does not spin, it means the starter motor is bad.
Test No 3: Starter Solenoid Bench Test
In the starter solenoid bench test, we will only discuss the procedure of testing the solenoid. We need one jumper cable, a fully charged battery, and an alligator clip.
Step 1: Connect The Jumper Cable
Place one end of the heavy jumper cable to the battery negative terminal and the other end to the starter motor case.
Step 2: Connect The Alligator Clip
Put one end of the alligator clip to the battery positive terminal and the other end to the solenoid control “S” terminal.
Possible Outcome
Now here is the Outcome Interpretation. If the pinion gear moves forward, it means the starter solenoid is good. And if the pinion gear does not move forward, it means the starter solenoid is bad.
Test No 4: Starter Motor Resistance Test With Multimeter
In this test, an ohmmeter is used to know the condition of the starter motor. We only need Ohmmeter to perform the test.
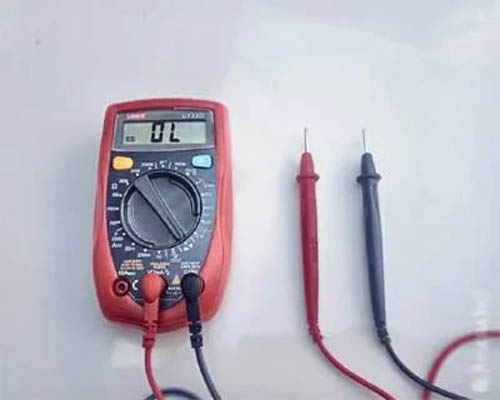
Before I proceed further, I want to give a little touch about ohmmeter. Look, Ohmmeter reads the resistance of the open circuit by “OL” which means the Open-Loop or Open Load. The “OL” represents that the circuit is open and does not have connectivity.
On the other hand, the ohmmeter reads the “Closed Circuit” in numerical values of zero or near zero. I hope you got the idea. Now come to the test procedure.
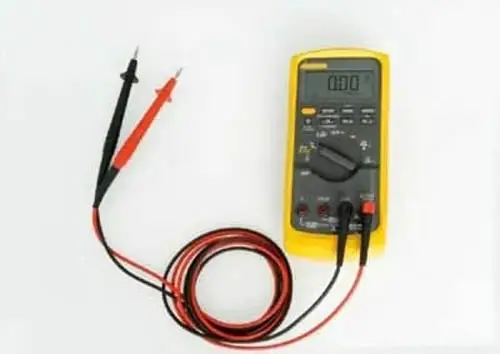
Step 1: Put The Leads In Multimeter
Put the black probe in the common socket and the red probe in the Ω omega socket in the multimeter. Also, turn the multimeter ON and set the dial range to the lowest resistance range on ohm mode.
Step 2: Attach The Leads With Starter Motor
Put the black lead of the ohmmeter on the starter motor case and the red lead on the starter motor output terminal located on the back of the solenoid cap.
Possible Outcome
Now here is the test result. If the ohmmeter reading is of zero or some values around zero. It means the starter motor is good. If the ohmmeter gives the reading of “OL”. It means the circuit is open and the starter motor is dead.
Related Post: How To Test A Starter Motor With Multimeter Without Removing
Test No 5: How To Test A Starter Solenoid With A Multimeter
In this starter solenoid, we will bench test the starter solenoid continuity with a multimeter, we will check the continuity of two heavy terminals located at the back of the solenoid cap.
Usually, without energizing the solenoid, the two terminals of the solenoid should be opened and it is considered a good working solenoid. However, by giving a power source to the solenoid, it should close these two heavy terminals, and the current starts to flow to the starter motor. In simple words, these terminals work as a bridge between the solenoid and motor assembly.
Remember the battery power should not be given to any terminal while performing this test.
Tool You Need
We need the multimeter to perform the job.
Step 1: Switch To Continuity Mode
Switch your multimeter to the continuity scale or radio wave symbol on the multimeter. And do a quick test to prove the continuity mode is working by joining both leads together to hear a beep sound.
Step 2: Attach The Leads With Starter Terminals
Place the tip of both leads of the multimeter on both heavy terminals of the solenoid.
Possible Outcome
Now here is the test result.
By attaching both leads to the solenoid terminals, If the multimeter does not produce a beep sound. It means the solenoid is good. If it does produce a beep sound, it means the solenoid is bad.
Related Post: 6 Complete Starter Solenoid Parts, Functions & Working
Sign Up